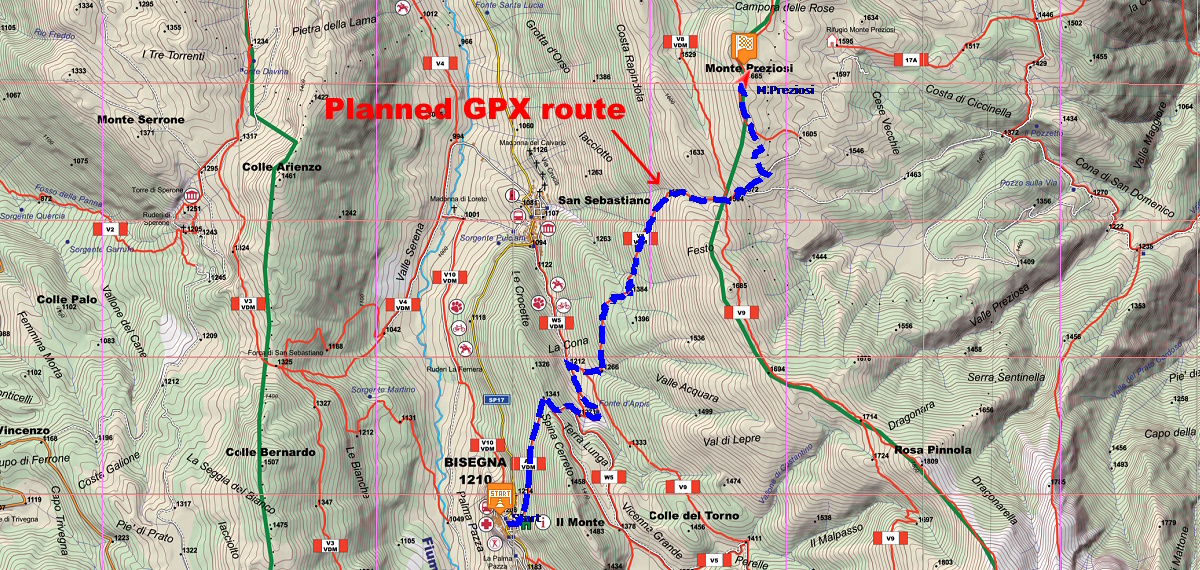
Discover how to plan reliable GPX routes for trekking and hiking
using digital maps, waypoints, and elevation data.
Introduction
Planning GPX routes before a hike helps reduce unexpected situations,
accurately assess difficulty and travel times,
and prepare an itinerary compatible with GPS devices and smartphones.
Planning a GPX route is a fundamental step
for safely tackling outdoor activities such as trekking,
hiking, mountain biking or trail running.
Properly preparing an itinerary makes it possible to evaluate distances,
elevation gain, travel times and critical points
before departure.
Prerequisites
Mapping or GPS software such as OkMap
Raster or vector maps of the selected area
GPX-compatible GPS receiver or smartphone
Topics covered
Creating and editing GPX routes
Analyzing distances, elevations and elevation gain
Using waypoints and reference points
Creating the GPX route
Route planning generally begins
with choosing the most suitable map.
Detailed topographic maps make it possible to identify trails,
mountain huts, water sources and elevation changes.
With tools such as OkMap, you can draw the route
directly on the map and save the result
in GPX format compatible with many GPS devices.
For a practical demonstration, you can refer to the tutorial
Prepare a Hiking Track.
An important element in hiking route planning
is the analysis of the elevation profile.
The total elevation gain directly affects
the difficulty and travel time.
The analysis of this data is covered in detail in the article
Analyzing and Managing GPX GPS Tracks.
Using
DEM data
makes it possible to obtain
more accurate elevation profiles and identify steep climbs,
exposed sections or particularly steep areas.
Waypoints and points of interest
During route planning, it is useful to add
waypoints
to identify strategic locations along the route,
such as mountain huts, springs, parking areas, or trail junctions.
Waypoint management is explained in detail in the tutorial
Managing Waypoints.
To learn more about organizing waypoints and points of interest
and managing the associated information, see the article
Organizing waypoints and POIs.
Waypoints simplify field navigation
and help organize hiking stages more efficiently.
Checking the route before departure
Before exporting the GPX file, it is recommended
to verify the accuracy of the route
and its consistency with the available maps.
It is important to check for trail interruptions,
tracking errors or passages through inaccessible areas.
Practical tips
Use updated and detailed topographic maps
Always analyze the elevation profile before departure
Add waypoints for critical or strategic points
Common mistakes
Planning routes without checking elevation gain
Ignoring the quality of the maps used
Exporting GPX files without checking the final route
Planning a GPX route involves selecting the map, defining
the itinerary, analyzing the elevation profile, evaluating
distances, and adding waypoints at strategic points along the route.
Software such as OkMap allows you to
create reliable itineraries for hiking and trekking.
What is the difference between a GPX track and a route?
A GPX track contains a sequence of points that describes
the actual path recorded on the ground, while a route
represents a series of waypoints or
passing points used by a GPS device to calculate the path to follow.
Why is it important to analyze elevation gain?
Elevation gain directly affects route difficulty and travel times.
Analyzing the elevation profile and DEM data
helps evaluate the effort
required for a hike and allows safer route planning.
Which maps should be used to plan a hike?
Detailed topographic maps, OpenStreetMap maps, and updated offline maps
help identify trails, points of interest,
and terrain features more
accurately when planning GPX routes.
Summary
GPX route planning makes it possible to approach trekking and hiking
with greater safety and awareness.
The correct use of digital maps, waypoints and elevation data
helps create more accurate and efficient itineraries.
Do you want to apply these concepts with OkMap?
After reading the technical articles, you can deepen your knowledge with practical video tutorials
or download OkMap Desktop and work directly with maps, GPX tracks and GPS data.